Author

Latosha D. Adams

Browsing

How Does Car Shipping Work?

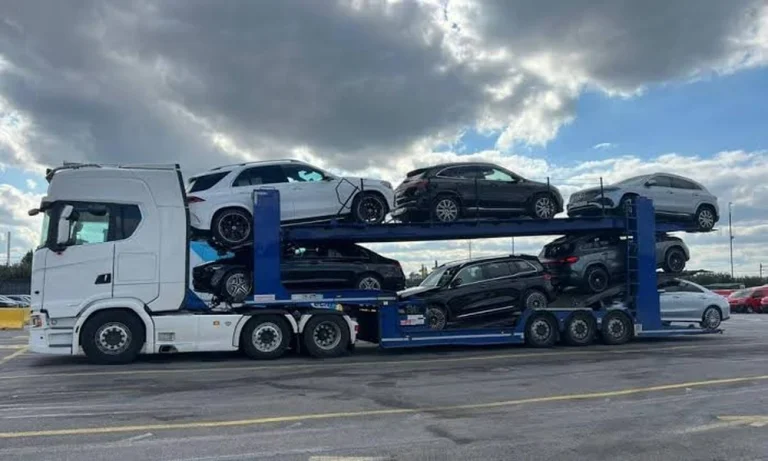
Car shipping is a specialized logistics service designed to transport motor vehicles safely from one location to another using heavy-duty auto carriers. Instead of putting hundreds or thousands of miles on your odometer-facing highway hazards, costly fuel stops, and vehicle wear and tear-professional auto transport handles the entire journey for you.

The complete vehicle shipping process follows a clear, structured sequence:

  1. Getting a quote
  2. Booking transportation
  3. Preparing the vehicle
  4. Scheduling pickup
  5. Completing the vehicle inspection
  6. Loading and transportation
  7. Tracking and communication
  8. Final delivery and inspection

For first-time shippers, the process is straightforward once you understand what to expect at each stage. Partnering with experienced professionals simplifies your move, whether you are relocating across the state or across the country.

Step 1: Get a Car Shipping Quote

The vehicle shipping journey begins by requesting an auto transport quote. Transport companies evaluate a variety of logistics details to generate an accurate estimate tailored to your vehicle’s specifications and timeline.

Several core factors directly influence the final cost of shipping a vehicle:

  • Pickup and delivery locations: Metropolitan routes with high carrier density are generally less expensive than remote or rural locations.
  • Vehicle type and size: Larger, heavier vehicles (like full-size trucks or SUVs) take up more weight capacity and deck space on a trailer than standard sedans.
  • Open vs. enclosed transport: Covered, fully enclosed trailers carry a premium compared to multi-car open trailers due to enhanced protection and specialized equipment.
  • Distance and route: Longer distances increase fuel usage and transit days.
  • Vehicle condition: Vehicles that roll, steer, and brake are standard; non-running vehicles require specialized winches or loading tools.
  • Timing and seasonal demand: Seasonal shifts (such as snowbird moves or summer rush) affect carrier availability and rates.

It is essential to review quotes carefully to understand what services, insurance coverage, and fees are included. Working with a reputable, licensed transport provider ensures transparent pricing without surprise costs down the road.

What Information Do You Need for a Car Shipping Quote?

To get a fast and precise rate estimate, prepare the following details before requesting your quote:

  • Vehicle year, make, and model
  • Pickup and delivery ZIP codes or specific addresses
  • Preferred shipping dates and flexibility
  • Vehicle operability (Does it run, roll, steer, and brake independently?)
  • Desired transport type (Open vs. Enclosed)
  • Special requirements for high-value, classic, luxury, or modified vehicles (e.g., ground clearance, custom dimensions)

Step 2: Book Your Auto Transport

Once you review and accept your auto transport quote, your order is officially placed into the dispatch scheduling pipeline. The carrier matches your shipment with an appropriate transport trailer traveling along your specified route.

  • Confirm details: Verify exact pickup and drop-off points, contact details, and vehicle specifics.
  • Establish scheduling windows: Provide a targeted pickup window (typically a few days) so driver routes can be optimized efficiently.
  • Provide documentation: Issue a formal transportation agreement outlining terms of service, payment arrangements, and liability details.

Always double-check that your phone numbers and emergency contacts are accurate so drivers can reach you directly. Keep in mind that exact pickup and delivery times remain subject to real-world highway conditions, weather changes, and traffic bottlenecks.

Step 3: Prepare Your Car for Shipping

Properly preparing your vehicle before the carrier arrives ensures a smooth loading process and keeps your vehicle safe during transit.

Use this practical pre-shipping checklist:

  1. Clean the vehicle: Wash the exterior so existing paint or body damage is clearly visible during pre-trip inspections.
  2. Clear out belongings: Remove personal items, loose objects, and valuable personal property.
  3. Secure exterior accessories: Detach or retract antennas, custom spoilers, bike racks, or loose trim pieces.
  4. Check mechanicals: Confirm tire pressure is correct, check for active fluid leaks, and make sure the battery is charged.
  5. Adjust fuel level: Keep the fuel tank between 1/4 and 1/3 full. This provides enough fuel for loading while keeping unnecessary weight off the transport rig.
  6. Disable security alarms: Turn off any aftermarket anti-theft alarms to prevent them from sounding while the truck is in motion.
  7. Document condition: Take crisp, time-stamped photos of all four sides, top surfaces, and interior cabin details.
  8. Prepare keys: Keep a set of ignition and trunk keys ready for the driver on pickup day.

What Should You Remove From Your Car Before Shipping?

Before handing your vehicle over to the driver, remove:

  • Personal belongings, clothing, and luggage
  • Valuables, cash, and important personal documents
  • Loose electronics, toll passes, parking transponders, and removable audio gear
  • Unsecured items in the trunk or backseat that could shift during transit

Carriers strictly limit personal cargo inside transported vehicles due to Department of Transportation (DOT) weight regulations and insurance limitations.

Step 4: Schedule the Vehicle Pickup

As your scheduled pickup window approaches, the transport driver or dispatch coordinator will contact you 24 to 48 hours in advance to arrange an exact meeting time.

You or a designated, authorized representative (aged 18 or older with access to keys) must be present for pickup. When the driver arrives with a multi-car trailer, they must evaluate local access conditions.

Potential pickup location challenges include:

  • Residential streets with tight turning radii
  • Narrow roads or sharp dead-ends
  • Strict local municipal parking restrictions
  • Low-hanging trees or overhead utility powerlines
  • Dense, highly congested urban centers

If your street is unsafe for a 75-foot transport rig, the driver will ask to meet at a nearby, spacious public area-such as a large shopping center parking lot or highway rest stop-to complete the handoff safely.

Step 5: Complete the Vehicle Inspection

Before your car touches the transport ramp, a thorough joint condition inspection takes place.

The pre-transport inspection process:

  • Visual walkaround: You and the driver walk around the vehicle together, noting pre-existing scratches, dents, paint chips, or glass damage.
  • The Bill of Lading (BOL): The driver records all pre-existing flaws onto the official Bill of Lading form, which serves as both your official transport receipt and condition report.
  • Review & sign: Read through the document carefully, ensure all current conditions are noted, and sign your copy.
  • Photo record: Capture high-resolution, time-stamped photographs of the vehicle alongside the driver as an extra layer of documentation.

Step 6: Your Car Is Loaded and Transported

With the inspection finalized, the driver safely loads your vehicle onto the transport trailer.

Loading involves securing each wheel using specialized soft-tie tire straps anchored directly to the trailer deck-avoiding stress on the vehicle’s frame or suspension components.

Transport Type Features & Protection Recommended Vehicle Types
Open Transport Multi-vehicle open air racks. Highly accessible, cost-effective, and fast scheduling. Daily drivers, standard sedans, SUVs, and standard utility trucks.
Enclosed Transport Fully enclosed, hard-sided trailers with hydraulic lift-gates and air-ride suspensions. Protects against weather, road grime, and debris. Luxury cars, classic automobiles, vintage race cars, exotic supercars, and modified vehicles.

During transit, overall delivery time depends on total route distance, driver federal hours-of-service mandates, weather patterns, and regional traffic conditions.

Step 7: Track and Stay in Contact During Transit

Professional auto shipping companies prioritize clear, continuous communication while your car is en route.

Modern vehicle shipping utilizes several tracking and communication channels:

  • GPS Tracking: Real-time location updates directly from company fleet tracking equipment.
  • Direct Driver Contact: Updates via phone or text from the driver as they complete checkpoints along the interstate.
  • Customer Support: Dedicated support agents available to address timeline adjustments or logistical queries.

Delivery estimates can shift due to mandatory weigh station stops, weather delays, or highway detours. Clear ongoing dialogue guarantees you stay informed at every leg of the journey.

Step 8: Vehicle Delivery and Final Inspection

When the carrier approaches your destination city, the driver will call 24 hours in advance to arrange the final drop-off appointment.

Upon arrival, carefully complete the delivery process:

  1. Unloading: The driver lowers your car safely from the carrier deck.
  2. Final Walkaround Inspection: Inspect the exterior and interior thoroughly in daylight alongside the driver.
  3. Cross-Check the BOL: Compare the current condition directly against the notes on the original Bill of Lading completed at pickup.
  4. Address Discrepancies: If any new damage or issues are noticed, make sure they are documented clearly on the driver’s copy of the Bill of Lading before signing.
  5. Sign & Complete: Sign the final delivery documentation to accept handover.

How Long Does Car Shipping Take?

Transit timing varies across shipments depending on total highway mileage and carrier routing.

Common transit timelines:

  • Short Distances (0-500 miles): 1 to 3 business days
  • Medium Distances (500-1,500 miles): 3 to 5 business days
  • Cross-Country (1,500-3,000+ miles): 7 to 10 business days

Factors impacting total duration include shipping distance, chosen route, regional weather fronts, driver rest mandates, traffic conditions, and seasonal demand peaks. Reputable auto transporters provide realistic timing windows rather than false guaranteed delivery hours.

How Much Does It Cost to Ship a Car?

Car shipping costs fluctuate based on market dynamics, trailer availability, and distance. On average, shipping rates range anywhere from $0.60 to $1.50+ per mile depending on shipment parameters.

Key cost factors include:

  • Distance & Route Popularity: Longer trips cost more overall, though per-mile rates drop on major interstate corridors.
  • Vehicle Dimensions: Heavier or larger vehicles cost more to transport.
  • Carrier Option: Enclosed transport generally carries a 25% to 50% premium over open transport.
  • Operability: Inoperable vehicles require winching equipment, adding labor fees.

Focusing strictly on the lowest quote can lead to hidden fees or delayed carrier assignment. Compare quotes based on included insurance, verified customer support, and direct carrier accountability.

Open vs. Enclosed Car Shipping: Which Should You Choose?

Selecting between open and enclosed transport depends on your vehicle’s value, vulnerability, and overall budget.

  • Open Auto Transport: Excellent for standard commuter cars, daily drivers, and budget-conscious relocations. Offers wide availability and fast turnaround times. Vehicles remain exposed to outdoor elements and highway road dust.
  • Enclosed Auto Transport: Essential for luxury, exotic, vintage, or custom vehicles requiring white-glove handling and shield protection from elements and road debris. Offers specialized hydraulic ramps, higher insurance limits, and complete privacy.

Evaluate your vehicle’s condition, weather forecast along the route, and personal risk tolerance when making your choice.

What Can You Expect From a Professional Car Shipping Company?

A trustworthy auto transport company takes the stress out of vehicle shipping by prioritizing structure, care, and clarity at every phase.

When working with industry leaders like Passport Transport, customers receive:

  • Transparent pricing and clear agreement terms without hidden surcharges
  • Experienced, background-checked professional drivers
  • Modern carrier equipment equipped with air-ride suspensions and lift-gates
  • Detailed condition reports and comprehensive insurance protection
  • Proactive location updates and attentive customer service

Common Car Shipping Mistakes to Avoid

Protect your shipment by keeping these critical mistakes in mind:

  • ❌ Booking based solely on the lowest price: Cheaper quotes often rely on unreliable sub-contractors or hidden fees.
  • ❌ Skipping inspection photos: Failing to document existing condition leaves you without visual proof.
  • ❌ Leaving prohibited items inside: Personal belongings add weight and risk damage or transit confiscation.
  • ❌ Providing inaccurate contact details: Wrong addresses or inactive phone numbers delay driver handoffs.
  • ❌ Last-minute scheduling: Waiting until the day of your move limits carrier availability and increases rates.
  • ❌ Ignoring agreement terms: Failing to read transport policies regarding delivery windows and claims processes.

Frequently Asked Questions About How Car Shipping Works

How does car shipping work from start to finish?

Car shipping begins with getting an accurate quote, selecting your transport trailer type, and booking your reservation. You prepare your car, complete a visual inspection with the driver at pickup, and track progress during transit. Once delivered, you inspect your vehicle against the original inspection report before signing off.

How long does it take to ship a car?

Transit time depends on total mileage. Short regional routes take 1 to 3 days, whereas cross-country shipments usually take 7 to 10 days once en route.

Can I ship a car that does not run?

Yes. Inoperable vehicles can be shipped using specialized winch equipment, provided the vehicle can still steer, roll, and brake safely.

Can I ship personal belongings inside my car?

Most carriers restrict personal cargo due to strict DOT weight limits and insurance regulations. Keeping your vehicle empty prevents transit damage and unexpected surcharges.

Is it better to use open or enclosed car transport?

Open transport is ideal for everyday vehicles where cost efficiency is top priority. Enclosed transport is recommended for classic, high-value, exotic, or collector vehicles needing protection from weather and road debris.

Do I need to be present when my car is picked up?

Yes, you or a designated representative over the age of 18 must be present to hand over keys, sign the Bill of Lading, and review the pre-trip inspection.

How do I prepare my car for shipping?

Clean your car, remove all personal items, turn off alarms, lower the gas tank to 1/4 full, check fluid levels, and take photos of all pre-existing condition details.

How do I know my car is safe during transport?

Reputable companies use professional wheel-strapping systems, carry comprehensive insurance, perform thorough pre-and-post inspection reports, and provide GPS tracking.

Can I ship a car across the country?

Yes. Professional carriers operate coast-to-coast routes across the entire United States, handling long-distance transport with door-to-door coordination.

What happens if my car is damaged during transport?

In the rare event of transit damage, document the issue on the Bill of Lading during the final inspection, take photos immediately, and submit a claim through the transport provider’s insurance coverage.

Car Shipping Checklist: What to Do Before Pickup

  • [ ] Get and review your official auto transport quote.
  • [ ] Confirm pickup and delivery location details and contact numbers.
  • [ ] Select open or enclosed transport according to your vehicle’s needs.
  • [ ] Wash and prepare the vehicle for inspection.
  • [ ] Remove all personal items, toll passes, and valuables.
  • [ ] Photograph the car from all angles in clear daylight.
  • [ ] Keep keys and necessary vehicle documentation handy.
  • [ ] Review driver arrival and access location details.
  • [ ] Confirm you or an authorized representative will be present at pickup.
  • [ ] Complete, review, and sign the initial Bill of Lading inspection report.

Final Takeaway: Understanding the Car Shipping Process

Shipping a vehicle is a streamlined, routine process when handled by experienced professionals. From securing an accurate quote to completing the final inspection walkaround, every step is designed to protect your vehicle and provide peace of mind throughout transit.

By preparing your car in advance, choosing the appropriate transport method, and working with trusted shipping specialists, you can ensure a seamless experience from pickup to delivery.

Ready to transport your vehicle safely? Reach out to the expert team at Passport Transport today to request your customized shipping quote.

Daily driving feels easier when vehicle features solve real road demands. Modern drivers value clear controls, useful storage, responsive safety systems, and flexible cabin functions. The Mike Calvert Ford of Houston dealership provides access to vehicles built around these practical needs. Good design matters during commutes, errands, highway trips, and changing traffic conditions. Each feature can reduce small daily frustrations while supporting smoother vehicle control. The right combination creates a more focused driving routine without adding unnecessary complexity.

Smart Controls Simplify Regular Driving

Clear controls help drivers manage common functions without distraction. Touch displays can organize navigation, audio, phone connections, and vehicle settings. Steering controls keep frequent adjustments closer to hand. Physical controls can also provide quick access when attention stays on traffic. Such choices make routine driving feel more natural.

Which Features Support Safer Awareness?

Road awareness depends on more than driver attention alone. Modern assistance features can provide useful information during changing traffic situations. Depending on vehicle configuration, drivers may find systems such as:

  • Alerts can highlight vehicles entering blind areas.
  • Cameras can improve visibility during tight parking.
  • Sensors can assist with nearby obstacle awareness.
  • Lane guidance can support steadier road positioning.
  • Rear alerts can help during reversing maneuvers.

These functions work as driving aids rather than replacements for attention. Their value becomes clearer during crowded streets and restricted parking areas.

Flexible Cabins Make Daily Tasks Easier

A practical cabin should adapt when daily plans change. Foldable seating can create additional carrying space for larger items. Adjustable storage areas help keep smaller belongings organized. USB connections can support devices during longer drives. In addition, useful cup holders and door storage reduce cabin clutter. For families, flexible seating can simplify changing passenger needs.

Can Technology Reduce Driving Distractions?

Technology becomes useful when it removes unnecessary driver interaction. Voice controls can handle selected functions without repeated screen touches. Wireless phone connections can reduce loose cables across the console. Digital displays can place key vehicle information where drivers can read it quickly. For drivers visiting the Mike Calvert Ford of Houston dealership, feature availability can vary by vehicle configuration and trim.

Everyday Comfort Depends On Small Details

Comfort comes from practical details rather than one major feature. Supportive seating can matter during longer commutes and extended highway travel. Climate controls help maintain a suitable cabin temperature across changing conditions. Adjustable steering positions can improve driver positioning. Quiet cabin design can also make conversations easier. These details influence how manageable each trip feels.

What Makes Features Useful Every Day?

Useful technology should save effort without demanding constant attention. Drivers benefit when controls feel familiar and information remains easy to read. A feature becomes more valuable when its purpose is clear during ordinary situations. For example, a rear camera matters most when visibility becomes limited. Practical design turns advanced functions into routine driving support.

Daily Details Shape The Driving Routine

The strongest vehicle features often reveal their value through repetition. A clear display, accessible storage area, or responsive camera can help during countless short trips. Over time, these details shape driving habits more than impressive specifications alone. A vehicle built around daily tasks can make each departure feel simpler, especially when small conveniences work together without demanding extra thought.

FAQs

Which features help during busy commutes?

Clear displays, driver alerts, phone connectivity, and responsive controls can make routine commuting easier while keeping essential information accessible.

Why does flexible storage matter?

Adaptable storage helps drivers manage groceries, work items, equipment, and personal belongings without overcrowding the passenger area.

Are driver assistance systems automatic substitutes?

No. These systems provide additional information or support, while attentive driving remains essential throughout every road situation.

Should vehicle features match driving habits?

Yes. Features become more useful when selected around actual commuting needs, passenger requirements, parking situations, and regular travel patterns.

Your motorcycle tyres are the only thing connecting your bike to the road. On a daily commute, they take a beating from potholes, sudden stops, and long hours of rolling heat.

The good news: with a few consistent habits, you can get significantly more life from them without giving up the grip and stability that keep you safe. No extreme measures needed, just smart, regular attention.

Pressure: The Biggest Factor for Motorcycle Tyres

Tyre pressure, meaning the amount of air inside the tyre measured in PSI, is the single most important variable you control. Check it when the tyre is cold, either before your first ride or after the bike has been stationary for at least two hours. Riding heats the air inside, making the reading unreliable.

Always use a good digital gauge. Petrol-pump gauges can be off by 2-3 PSI. That sounds small, but it is enough to noticeably affect both wear and handling.

Follow your manufacturer’s recommended pressure, not the maximum figure stamped on the tyre sidewall (the vertical side of the tyre between the tread and the wheel rim). Under-inflated tyres wear along the outer edges and overheat.

Over-inflated tyres wear down the centre fast and reduce grip, which is the friction that keeps your tyre from sliding. Make pressure checks a weekly habit.

Riding Habits That Protect Your Motorcycle Tyres

Smooth riding is one of the simplest ways to protect your tyres. Hard acceleration and sudden braking scrub rubber off quickly, especially from the rear. Instead, brake progressively using both front and rear brakes, and ease off the throttle early when approaching a queue.

In corners, keep your speed sensible. Aggressive leaning generates heat along the outer edges of the tread (the grooved rubber that contacts the road), wearing those edges faster. Looking further ahead, anticipating stops, and rolling to a natural slow-down rather than panic-braking all save rubber and reduce rider fatigue too.

Habits That Quietly Shorten Tyre Life

Some everyday behaviours damage tyres without obvious warning signs:

  • Hitting potholes at speed: A hard impact can create a bulge, which is a raised bubble on the tyre wall caused by internal structural damage, or leave a flat spot on the tread surface.
  • Scraping kerbs while parking: Even occasional sidewall contact weakens the internal structure over time.
  • Overloading the bike: Exceeding your manufacturer’s load limit puts extra stress on the rear tyre and speeds up wear.
  • Skipping wheel alignment: Misaligned wheels cause one side of the tread to wear faster than the other. Get alignment and wheel balance checked around every 5,000 km.

Also, park in shade wherever possible. Direct sunlight and heat dry out the rubber compound and cause fine surface cracking, shortening the tyre’s usable life even when the bike is standing still.

[H2] A Simple Routine for Long Lasting Tyres

Task Frequency
Quick visual check for damage or embedded objects Every ride
Cold pressure check with a digital gauge Weekly
Full inspection: tread depth, sidewalls, wear patterns Monthly
Wheel balance and alignment at a workshop Every 5,000 km

Know when to stop pushing a tyre further. Replace when the tread reaches the wear indicators, which are small raised bars moulded into the grooves. When the tread is level with them, wet grip drops sharply.

Also, plan replacement if the tyre is four to five years old, even if the tread visibly remains. Many experts recommend a professional inspection after five years and unconditional replacement by ten years.

Be Careful With Puncture Repairs

Punctures are an unavoidable part of motorcycling for many riders. The important thing is to have them repaired correctly.

Don’t treat every puncture as something that can simply be plugged and forgotten. The location, size and type of damage matter, and some damage may make the tyre unsuitable for continued use.

If you’ve been riding with a puncture or significantly low tyre pressure, have the tyre inspected properly. Continuing to ride on a damaged tyre can worsen the problem and reduce the overall life of your long-lasting tyres.

Don’t Ignore the Weather

Your tyres behave differently depending on the road conditions. During the monsoon, standing water, mud, oil and road debris can reduce available grip. During extremely hot weather, road temperatures can become another factor worth considering.

You don’t need a different riding technique every time the weather changes, but you should adapt your speed and braking to the conditions.

On wet roads, leave more stopping distance and avoid sudden acceleration, braking or direction changes. This isn’t only about tyre life, it’s basic motorcycle safety.

[H2] Avoid common habits that kill tyres [H2]

Some everyday practices silently shorten tyre life:

  • Frequent curb contact: Scraping tyres against curbs while parking or U-turning damages the sidewall and can cause internal weakness.
  • Riding over potholes at speed: Hitting deep potholes hard can create flat spots, bulges, or internal damage that isn’t immediately visible.
  • Overloading the bike: Carrying heavy luggage or an extra passenger regularly increases stress on the rear tyre, accelerating wear.

Your Tyres Are a Safety Investment, Not Just a Running Cost

Every habit here, from checking pressure weekly to riding smoothly to parking in the shade, compounds over thousands of kilometres. The aim is not simply to push off a replacement purchase.

It is to make sure every kilometre you ride in between is as safe and controlled as possible. Treat your tyres as the safety equipment they are, and they will reward you with a longer, more reliable life.

Coolant loss can happen slowly even when the driveway remains completely dry. The cooling system can develop small leaks that appear only during operation. So, a vehicle may lose coolant without showing obvious evidence afterward. Sometimes escaping coolant reaches hot engine parts and evaporates quickly. Other times coolant enters internal engine areas where it cannot reach pavement. Understanding these hidden causes helps prevent serious overheating and expensive engine damage. Proper inspection can reveal problems before coolant loss becomes severe.

Small Hose Leaks Can Hide During Normal Driving

Cooling hoses constantly experience heat pressure and chemical exposure during normal operation. Over time rubber can become brittle while small surface cracks gradually develop. These cracks may open wider when the engine reaches operating temperature. Coolant can escape through those openings before evaporating against nearby hot components. A hose may therefore appear acceptable during a basic visual inspection.

A Damaged Radiator Can Release Coolant Slowly

Radiators can develop tiny cracks around tanks seams or connection points. These damaged areas may release coolant only when system pressure increases. The escaping fluid can spread across hot radiator surfaces and evaporate rapidly. So, no large puddle may form beneath the vehicle afterward. Corrosion can also weaken radiator components and create extremely small leakage paths. A professional inspection can identify these problems before radiator failure becomes severe. C&C Automotive can inspect the pump and surrounding components for hidden leakage.

Internal Engine Leaks Can Consume Coolant

Some coolant leaks occur inside the engine rather than outside it. A damaged head gasket can allow coolant into combustion chambers or engine passages. This problem may cause coolant consumption without producing any visible driveway puddle. White exhaust smoke can sometimes appear when coolant enters combustion areas. Milky engine oil can also indicate unwanted coolant contamination inside the engine.

Professional Testing Can Locate Difficult Cooling System Problems

Finding hidden coolant loss often requires more than checking the reservoir. A technician can inspect hoses seals radiator connections and other cooling components. Pressure testing can expose leaks that remain invisible during ordinary engine operation. Coolant residue may also reveal where fluid has previously escaped. If the cause remains unclear further diagnostic testing may become necessary. Drivers seeking Auto Repair in Aiken, SC can benefit from professional cooling system inspection. C&C Automotive can help identify the source before overheating creates expensive mechanical problems.

FAQs

Can Coolant Disappear Without Any Visible Leak?

Yes. Small leaks can evaporate against hot engine components before reaching pavement.

Why Does Coolant Loss Increase During Highway Driving?

Higher engine temperatures and system pressure can enlarge tiny leaks during longer drives.

Why Does the Coolant Reservoir Keep Becoming Empty?

Repeated loss usually indicates leakage or internal coolant consumption that requires proper diagnosis.

Can Coolant Loss Damage an Otherwise Healthy Engine?

Yes. Low coolant can cause overheating and may eventually create severe engine damage.

Finding a cheap used car for sale does not mean you have to compromise on quality, comfort, or reliability. SUVs remain one of the most popular vehicle choices because they offer extra space, higher seating positions, and the flexibility to handle daily commuting, family trips, and weekend adventures. At HS Autolux, drivers can explore a wide selection of dependable pre-owned SUVs that provide excellent value without stretching their budget.

Why Choose a Used SUV?

A used SUV offers many advantages over buying a brand-new model. Since new vehicles experience the fastest depreciation during the first few years, purchasing a pre-owned SUV allows buyers to enjoy many of the same features at a significantly lower price. If you are searching for a cheap used car for sale, choosing an SUV can give you more versatility while keeping your monthly expenses manageable.

Many modern SUVs also include advanced safety technology, comfortable interiors, touchscreen infotainment systems, and impressive fuel efficiency. This means you can enjoy today’s conveniences without paying the premium price of a new vehicle.

SUVs Worth Considering

When shopping for your next SUV, it’s important to focus on models known for their reliability and long-term value. Some excellent options include:

  • Toyota RAV4 – Well-known for durability, fuel economy, and low maintenance costs.
  • Honda CR-V – Offers a spacious cabin, smooth ride, and dependable performance.
  • Ford Escape – A practical compact SUV with user-friendly technology and comfortable seating.
  • Hyundai Tucson – Delivers modern styling, excellent value, and a comfortable driving experience.
  • Nissan Rogue – Provides generous cargo space and impressive fuel efficiency for everyday driving.

These models are consistently popular among buyers looking for a cheap used car for sale because they balance affordability with reliability.

What to Look for Before Buying

Before purchasing any used SUV, review the vehicle history, maintenance records, and overall condition. A professional inspection can help identify any potential issues before you make your decision. It’s also helpful to take the vehicle for a test drive to evaluate its handling, braking, and comfort.

At HS Autolux, every customer receives guidance throughout the buying process. The dealership carefully selects quality pre-owned vehicles, making it easier to find an SUV that fits both your needs and your budget.

Find Your Next SUV at HS Autolux

Shopping for a cheap used car for sale becomes much easier when you work with a dealership that values transparency and customer satisfaction. Whether you need a compact SUV for city driving or a larger model for your growing family, HS Autolux offers dependable options at competitive prices.

Visit HS Autolux today to explore affordable used SUVs and drive home in a vehicle that delivers comfort, value, and confidence for every mile.

This post was written by a professional at HS Autolux LLC. HS Autolux LLC is a full-service used car dealership company in Orlando, specializing in selling affordable used cars under $10,000, cash car sales, trade-ins, and certified and inspected used vehicles. If you’re searching for cheap cars for sale in Sanford FL, our dealership offers a wide selection of reliable and budget-friendly options to meet different needs and lifestyles. As one of the leading used car dealership companies near you, we serve clients throughout Orlando, Kissimmee, and Sanford. Our experienced team provides expert guidance and reliable solutions, making us a trusted choice for drivers looking for cheap cars for sale in Orlando FL while prioritizing quality, value, and performance.

Vehicle are sitting outside a repair facility rarely tells the whole story. From a distance, the damage may appear limited to a scratched bumper or a dented screen. Inside the shop, technicians move around the vehicle with lights, and inspection notes. While waiting for updates, some owners pause to learn more about replacement parts, paint work, and the steps that happen after an estimate gets approved. The repair process begins quietly, long before any fresh paint reaches the vehicle.

The First Inspection Usually Changes the Conversation

A silver sedan rolled into a service bay shortly after opening time. The front corner looked damaged, but additional issues appeared once the bumper came off. Small cracks hid beneath areas covered by road grime. A technician placed removed parts beside a toolbox while another employee reviewed photographs from the initial inspection. The estimate on paper started looking different from the estimate discussed days earlier.

Parts Arrive at Different Times

Several boxes rested against a wall near the receiving area. One contained a replacement fender. Another held trim pieces wrapped in protective plastic. A third shipment arrived two days later than expected.Work continued where possible. Nearby vehicles followed different schedules. One waited for a mirror assembly, another for a grille. The repair floor never looked completely finished because new deliveries seemed to appear every afternoon.

Reflections Reveal What Eyes Miss

Freshly repaired panels attract attention under bright lighting.A technician wiped a painted surface with a clean cloth and stepped backward. Reflections from overhead lights stretched across the door panel. A slight imperfection appeared near the edge. Sanding resumed. More polishing followed.Hours later, the same panel reflected light evenly. The difference felt small until the vehicle rolled outside.

A Small Dent Received More Attention Than Expected

Near the back corner of the shop, a technician focused on a dent smaller than a golf ball.The surrounding paint remained intact. No replacement panel sat nearby. No sanding dust filled the air. Specialized tools moved behind the metal surface while tiny adjustments slowly changed the shape. From several feet away, progress seemed invisible. Up close, the panel looked different every few minutes.

Paint Booth Activity Feels Separate from Everything Else

The repair floor stayed busy with movement and conversation. Behind another door, the atmosphere changed.A vehicle entered the paint booth after preparation work finished. Masking materials covered sections not being painted. Fresh colour settled across repaired panels. Hours later, the finish looked deep and smooth beneath controlled lighting conditions.

Outside the booth, technicians continued repairs on other vehicles without interruption.

Common Activities Seen During Restoration

Repair Stage What Happens in The Shop What Gets Checked
Parts Replacement New components arrive Fitment and alignment
Dent Repair Metal reshaping occurs Surface smoothness
Auto Painting Panels receive refinishing Colour consistency
Final Review Vehicle undergoes inspection Overall appearance and finish

Insurance Files Tend to Grow

Folders stacked near a desk contained estimates, photographs, approval documents, and handwritten notes. Phones rang throughout the day. A service advisor reviewed paperwork while speaking with a customer about claim updates.Midway through the repair process, drivers occasionally stop to learn more about insurance procedures because unexpected details emerge after disassembly begins. Additional approvals sometimes arrive. Other times, revised estimates wait for review.

FAQs

Why do repair timelines sometimes change?

Additional damage occasionally appears after parts are removed, leading to revised repair schedules.

Can repaired paint match the original finish exactly?

Paint technicians spend considerable time comparing colour and reflections before approving finished work.

There’s a practical version of COE renewal in Singapore involving financing, paperwork, and vehicle valuation.

And then there’s the emotional version.

The emotional version usually begins with denial, briefly passes through confusion, and eventually ends with a calculator open at 1:12 AM while you question every financial decision you’ve made since owning a car.

If that sounds familiar, congratulations-you’re participating in one of Singapore’s most unintentionally stressful traditions.

Here’s how the typical experience unfolds.

Stage 1: “Wait… It’s Expiring Already?”

Time moves differently when you own a car in Singapore.

One minute you’re proudly collecting your keys, and the next, someone casually mentions your COE expiry date and your entire afternoon changes direction.

This stage usually involves mild panic, several searches about COE renewal Singapore, and a sudden interest in your car’s long-term future.

Stage 2: The Spreadsheet Era

This is where things become technical.

You start comparing:

  • Renewal costs
  • Current COE premiums
  • Vehicle depreciation
  • Financing options
  • The cost of buying another vehicle

At this point, many drivers realize something important: replacing a perfectly functional car may not actually be the smartest financial move.

For vehicles still in good condition, singapore coe renewal often becomes the more practical option.

Of course, practicality becomes easier to appreciate once you stop emotionally reacting to COE prices for a few minutes.

Stage 3: Asking Everyone for Advice

Suddenly, everyone around you becomes a transport finance expert.

Your colleague has a strategy.
Your cousin “knows a better option.”
Someone in a group chat mentions market timing with the confidence of a stockbroker during earnings season.

Unfortunately, most advice creates more confusion than clarity.

That’s usually the point when drivers start exploring structured platforms that simplify the process rather than piecing together information from a dozen different sources and hoping it all somehow aligns.

Because while Singaporeans are efficient people, nobody genuinely enjoys turning vehicle administration into a weekend research project.

Stage 4: Realizing Timing Actually Matters

One of the biggest mistakes drivers make is assuming they can “sort it out later.”

COE premiums fluctuate regularly, and delaying decisions often reduces flexibility. Financing options may change, costs can increase, and rushed decisions rarely feel particularly satisfying afterward.

Planning ahead gives drivers room to compare options carefully instead of making high-pressure decisions a few days before expiry.

Which is generally preferable to panic-refreshing market prices during lunch breaks.

Stage 5: Wanting the Simplest Possible Process

Eventually, most drivers arrive at the same conclusion:

They do not want a complicated experience.

They want transparency, guidance, financing support if needed, and a process that doesn’t require a secondary degree in administrative systems.

That’s ultimately why singapore car coe renewal services continue growing in popularity across Singapore.

Stage 6: Relief

Once the process is completed, the emotional journey ends exactly where most Singaporeans prefer things to end: efficiently.

Because while coe renewal is unavoidable, unnecessary stress really shouldn’t be part of the package.

When your vehicle breaks down or starts showing signs of trouble, finding a dependable mechanic quickly becomes a priority. Driving a car with mechanical problems can be stressful, and taking time out of your busy schedule to sit in a repair shop waiting room is not always convenient. That is why choosing a mobile mechanic Hawthorne service can be one of the easiest and most practical solutions for local drivers.

As a mobile mechanic serving Hawthorne, I bring professional automotive services directly to your location. Whether your vehicle is at home, parked at work, or stranded somewhere nearby, I come to you with the tools and experience needed to diagnose and repair many common vehicle problems.

One of the biggest advantages of hiring a mobile mechanic Hawthorne service is convenience. Traditional repair shops often require appointments, towing services, and hours of waiting. With a mobile mechanic, you save valuable time because the service comes directly to your location. There is no need to rearrange your day or worry about how you will get your car to a shop.

Another reason to call me is dependable service and attention to detail. Vehicle issues can range from small repairs to major concerns, and every problem deserves proper diagnosis and care. From brake repairs and battery replacements to starter issues, alternator problems, tune-ups, and general maintenance, I work to identify the issue and provide an efficient solution.

Cost savings can also be a major benefit. Traditional auto repair facilities often have large overhead expenses that may be reflected in pricing. Choosing a mobile mechanic Hawthorne service may help reduce unnecessary costs while still receiving quality automotive work.

Fast response times are also important when your car is not functioning properly. No one wants to be stuck with a vehicle that will not start or a problem that keeps getting worse. Getting quick help can prevent small issues from turning into larger and more expensive repairs later.

Customer satisfaction matters because trust is important when it comes to automotive repairs. My goal is to provide honest service, clear communication, and reliable work that helps get you back on the road safely.

If you are in Hawthorne and need professional automotive help without the hassle of visiting a repair shop, call me today. A trusted mobile mechanic Hawthorne service gives you convenience, saves time, and provides reliable repairs where you need them most. When your car needs attention, having a mechanic come directly to you can make all the difference.

The car water pump is a small but vital part. It keeps the engine cool. Without it, the engine can overheat, causing damage.

The pump moves coolant through the engine. This keeps the engine at a safe temperature. If it fails, you might notice the engine running hotter, weak cabin heat, or a sweet smell.

This guide explains the signs of a failing water pump. You’ll learn about leaks, temperature changes, noises, steam, and corrosion. Knowing these signs can help prevent engine damage and save you money.

Key Takeaways

  • The car’s water pump keeps coolant circulation moving to control engine temperature.
  • Water pump symptoms can appear quickly, especially during hot weather or heavy traffic.
  • Common failing water pump signs include leaks, rising temperatures, noises, steam, and corrosion.
  • A weakened engine cooling system can lead to rapid overheating and serious engine damage.
  • Early diagnosis is one of the best ways to prevent engine overheating and high repair costs.
  • Understanding the warning signs helps you decide when to stop driving and get it checked.

Why the Water Pump Matters in the Engine Cooling System

The car’s water pump keeps coolant moving. This stops heat from building up in the engine. It’s key for keeping the engine cool, whether you’re stuck in traffic or driving on the highway.

Coolant flows in a loop. It goes from the radiator, through the engine, and back again. This keeps everything running smoothly.

Heater core coolant flow also plays a part. When you turn on the heater, hot coolant goes through a small radiator in the dashboard. Then, it goes back into the system.

Inside the pump, each part has a job. The impeller moves coolant. The bearing seal keeps everything in place. A worn seal can cause problems.

How the pump is driven is important too. Some use the serpentine belt, while others use a timing belt. This affects how fast coolant flows.

Cooling-system element

What it does in radiator and engine circulation

What tends to fail first

What drivers often notice

Impeller

Pushes coolant through passages to keep the coolant flow path active

Blade wear, cracking, or slipping on the shaft

Temperature swings, weak cabin heat during heater core coolant flow demand

Bearing and seal

Keeps the shaft stable and coolant contained

Impeller bearing seal wear, noisy bearing, seepage

Whining or grinding from the front of the engine, dampness near the pump

Housing and gasket

Mounts the pump and seals it to the engine

Gasket shrink, corrosion, or warping

External drips, crusty residue around the mounting area

Pulley and belt drive

Transfers rotation from the belt to the pump

Misalignment, belt wear, tension issues

Squeal on startup, reduced flow at idle with a serpentine belt setup

Timing cover area (belt-driven designs)

Supports a timing belt driven water pump tucked behind covers

Seal leak that spreads under the covers

Coolant smell, unexplained loss with no obvious puddle

Car Water Pump Warning Signs Drivers Commonly Notice

Most car water pump warning signs appear in small ways before they become big problems. Drivers often see changes on the dashboard, a new smell, or damp spots under the car. Catching these signs early helps avoid being stuck on the side of the road.

  • Dash behavior that feels “off,” including temperature fluctuations and a temperature gauge high reading that comes and goes
  • A fresh coolant puddle in front of the car, sometimes near the center line, with coolant that may look green, orange, pink, or red
  • A new grinding whining noise from the front of the engine bay that rises and falls with RPM
  • Steam under the hood after a hot run, especially when coolant hits warm parts and flashes to vapor
  • Warning indicators, such as a coolant warning light that appears even if the engine feels “okay” for the moment

What you notice first

What it often looks or sounds like

Why it matters right away

Temperature fluctuations

The needle drifts up, settles, then climbs again, specially in traffic

Uneven coolant flow can make heat build in pockets, stressing hoses and gaskets

Temperature gauge high

Runs higher than your normal baseline on hills, towing, or long idling

Higher load needs steady circulation; weak flow can tip the engine into overheating

Coolant puddle front of car

Sweet smell and a wet patch near the front/center-front after parking

Low coolant reduces heat control and can pull air into the system

Grinding whining noise

Whirring, squeal, or a rough bearing sound that changes with RPM

Bearing or pulley wear can worsen fast and affect belt drive and circulation

Steam under hood

Visible vapor near the radiator area or around hot engine parts

Steam can signal overheating or coolant contacting hot surfaces

Coolant warning light

Light comes on during stops, slow climbs, or after a warm restart

It’s a prompt to reduce load and check levels before heat spikes further

These symptoms can add up quickly. A small leak or a faint noise can turn into a bigger cooling loss, then overheating. If the dash starts acting strange, treat it as a time-sensitive change, not a “wait and see” issue.

Coolant Leaks and Drips That Point to a Failing Pump

A water pump coolant leak often shows up after you park. Look for a coolant puddle under car near the center-front area. It’s closer to the timing cover and front of the engine block than the radiator. On many vehicles in Australia, that spot is the first place a slow drip collects.

One common cause is a water pump gasket leak. As the gasket ages, it can flatten or crack. This lets coolant seep down the pump body. The drip may start as a damp edge, then turn into a steady trail that leaves dried residue around bolts and seams.

Leaks can also come from inside the pump. When the internal seal wears, a weep hole leak may appear. It shows as a few drops under the pump snout, then worsens over time. A cracked pump housing can mimic the same symptoms, showing more when the engine is hot.

Pay attention to what you see on the ground. Coolant colors green, orange, pink, and red can all be normal. This depends on what was used last, so color alone won’t confirm the brand or type. Even without a visible puddle, the level can fall if seepage hits hot surfaces and evaporates or if it leaks mostly while driving under pressure.

When the source isn’t obvious, a cooling system pressure test can help. It can reveal a slow seep at the pump gasket, a drip at the weep hole, or a fine spray from a hairline crack. This only shows under load.

What you notice

Where it tends to appear

What it can point to

Coolant puddle under car after parking

Center-front under the engine, near timing cover area

Water pump gasket leak or a larger external water pump coolant leak

Small, repeated drops with no big puddle

Under the pump pulley area

Weep hole leak from a weakening internal seal

Crusty residue and damp tracks

Around pump seams and mounting bolts

Slow gasket seepage that spreads as it runs down the housing

Coolant smell but little to see on the ground

On hot engine surfaces near the pump

Evaporating seepage that can be confirmed with a cooling system pressure test

Wet spots matching coolant color green, orange, pink, red

On splash shields or lower engine components

Active leak that’s being carried by airflow while driving

Overheating Symptoms That Should Never Be Ignored

When the engine overheats, the water pump can’t move coolant fast enough. This happens a lot in stop-and-go traffic, on long climbs, or while towing. In Australia’s summer, this extra load can cause trouble.

If the needle on the temperature gauge is higher than usual or keeps bouncing, it’s a warning. Seeing the temperature gauge in the red zone means damage can start in minutes. A coolant warning light can also mean the system is low, leaking, or not flowing properly.

Steam under the hood is another sign. It often shows up when you pull up at lights or park after driving hard. Steam can come from coolant dripping onto hot parts or from boiling coolant as pressure drops. Either way, it means temperatures are too high.

What you notice

What it often points to

Why it matters now

Temperature gauge rising above normal, then dropping

Coolant flow that comes and goes, often tied to pump speed

Heat cycling can stress seals and gaskets, making failures more likely

Temperature gauge red zone or a sudden spike during a hill climb

Low coolant movement under load and higher engine heat output

Fast overheating can lead to warped cylinder head and head gasket damage

Coolant warning light with a sweet smell after stopping

Coolant loss, trapped air, or poor circulation

Low coolant can expose hot spots that crack metal over time

Steam under hood near the radiator area

Boiling coolant, leaks hitting hot components, or pressure release

Severe heat events raise the risk of cracked cylinder head and burnt pistons

If the gauge climbs, turn the cabin heater to max and the fan to high. This pulls heat away from the engine. Then pull over as soon as it’s safe and shut the engine off. Do not open the radiator cap, as pressurized coolant can spray and burn.

If the warning returns right away, arrange a tow instead of driving on. Repeated overheating can turn a small cooling issue into a ruined engine. This includes head gasket damage, a warped cylinder head, a cracked cylinder head, or burnt pistons.

Unusual Noises From the Front of the Engine Bay

Strange sounds up front often show up before a leak does. A water pump whining noise can have a smooth, harmonic tone. This tone rises and falls with engine RPM.

It may be louder on cold starts, then fade as parts warm up. Even so, the pitch usually tracks the throttle. This helps separate it from random rattles.

A sharp high-pitched squeal pulley can point to alignment trouble or a pulley that is starting to wobble. That wobble is one sign of water pump pulley failure. This is true, even if it happens right after a belt service or tension adjustment.

When the noise turns rough, listen for a grinding noise water pump bearing. That sound can come from worn rollers inside the pump. Here, friction builds as the bearing surface breaks down.

One quick clue is bearing play. With the engine off and cool, a pulley that rocks by hand can hint at internal wear. Even if it spins, it shows signs of wear.

Sound and feel

What it often tracks

What it can point to

Why it matters

Water pump whining noise that rises with RPM

Changes with throttle, sometimes louder when cold

Early bearing wear inside the pump

Heat and friction can build fast as the bearing degrades

High-pitched squeal pulley near the belt path

May flare during startup or quick revs

Water pump pulley failure or pulley misalignment

A wobbling pulley can stress the belt and nearby accessories

Grinding noise water pump bearing with a harsh, sandy tone

Gets worse under load and with RPM

Late-stage bearing damage

The pump can seize without much warning

Chirp or squeal that changes after spraying water on the belt

Briefly quiets or shifts tone

Serpentine belt noise vs water pump

Belt slip can mimic pump issues, so it helps narrow the source

If a belt-driven pump locks up, it can shred the belt. This upsets charging and cooling at the same time. On timing-belt-driven setups, a seized pump can also overload the timing belt. This is a bigger risk for interference engines.

Visible Rust, Corrosion, or Deposits Around the Pump Area

When you look under the hood, check the engine’s front near the belt drive. This is where water pump corrosion often starts. You might see rust on the pump housing or a dried coolant ring at the gasket line.

Staining can be white, orange, or green, depending on the coolant. These deposits can form around the pump and on the engine. Over time, they can harden and block flow.

Coolant condition is key. Bad coolant can cause impeller corrosion, weakening the pump. Acidic coolant can attack metal from the inside out.

Pressure issues can also be a sign. A failing pressure plug can lead to rust and reduced pump performance. For more clues, check this inspection checklist.

What you see near the pump

What it can suggest

Why it matters to cooling performance

Orange streaks or flaking metal on the housing

rust on water pump and advancing surface breakdown

Rough surfaces can worsen sealing and promote ongoing water pump corrosion

Chalky white crust around gasket edges or the weep hole

coolant deposits from slow seepage and evaporation

Residue can harden into mineral buildup that restricts local flow

Brown sludge or gel-like residue inside the neck or near fittings

contaminated coolant and additive drop-out

Thicker fluid moves poorly and can raise system temps under load

Pitted metal or worn vanes (when the pump is off)

impeller corrosion linked to old coolant chemistry

Lower pump output reduces circulation and can trigger overheating

General dulling and etching of metal surfaces

degraded coolant acidic conditions over time

Accelerates internal wear across hoses, radiator, and pump surfaces

Seal Failure, Weep Holes, and Damage on the Dry Side of the Pump

The water pump has a seal to keep coolant inside. When this seal fails, pumps have a weep hole to warn us. A few drops are okay at first, but steady dripping is a big warning.

But, some leaks don’t show up on the ground. They might evaporate on hot metal. This makes it hard to see the leak.

Look at the pump body and behind the pulley for signs. Over time, you might see stains or pitting. In bad cases, you’ll see holes or worn spots.

Cavitation is another problem. It happens when coolant flow is disrupted. This creates bubbles that can damage the pump.

What You Notice

What It Often Means

What to Check Next

Steady wetness under the pump snout

weep hole dripping that tracks with engine temperature

Inspect the vent area with a light; look for fresh coolant traces after a drive

Coolant level drops but no puddle

Slow seepage masked by internal leak evaporation

Check for dried residue on the pump and nearby timing cover; pressure test if needed

Crusty deposits near the shaft area

outer seal deterioration and early seal wear

Look for streaking, staining, and residue patterns that start at the pump

Pitting or pinholes on the back side of the housing

dry side damage linked to long-term wear or corrosion

Inspect with mirrors or from below; confirm the pump housing isn’t compromised

Rough flow symptoms with no obvious hose issue

coolant inlet bubbles and cavitation stress near the impeller

Check coolant condition, proper fill level, and for signs of aeration in the system

Seeing signs of seal failure or weep hole dripping means trouble. It can lead to bigger cooling issues. Catching it early helps avoid damage to hoses and the radiator.

Repair Timing and Prevention to Avoid Costly Engine Damage

When signs appear, it’s time to think about replacing the water pump. A weak pump can’t move coolant, leading to fast heat buildup. Driving a bit longer can turn a small fix into a big engine problem.

Overheating can cause huge costs. If the gauge gets too hot, it can damage the engine. This includes warping cylinder heads, blowing head gaskets, cracking blocks, or seizing pistons. Replacing the pump early can prevent these problems.

On many Australian vehicles, replacing the timing belt and water pump together is wise. This saves money because the labor is the same. It’s even more important for interference engines, where a bad pump can cause belt failure and piston damage.

Prevention is about regular habits and checks. Follow coolant flush intervals to avoid damage from old coolant. Good maintenance also means checking for coolant mix-ups, keeping belt tension right, and getting a pressure test when leaks are suspected.

The vast roads of Utah demand more space. Now you can find better ways to haul. Sometimes the standard trailer length is not enough. You want to carry more gear on trips. So, the local industry is changing very fast. custom trailer extensions utah provide the perfect solution today. These steel additions make every single journey easier. You can now fit larger loads with ease. A1 Trailer Repair and Welding help many local drivers. But the process requires very skilled hands. The right extension changes how people move goods.

Expanding Your Horizons

A standard trailer has many physical limits. But you can grow your hauling capacity now. Sometimes you need extra feet for big toys. You have many options for your specific rig. The new space allows for much larger equipment. Now your old trailer feels brand new again. You can trust the strength of expert welds. Expert teams like A1 Trailer Repair and Welding focus on safety. But they also prioritize your unique hauling goals. The frame must remain balanced for the road. You need a stable ride for long trips.

Engineering Strength and Safety

Metal work must be very precise and strong. The steel must handle heavy weight every day. But the added length should not be heavy. You want a trailer that stays very light. Specialized shops use high quality steel for builds. Now the frame can take much more stress. You will notice better handling on the highway. Sometimes the extra length helps with weight distribution. This keeps your truck and trailer very safe. A1 Trailer Repair and Welding use over twenty years of experience. So, the final product is always very durable.

Professional Craftsmanship on the Road

Mobile services make these upgrades very easy now. You do not have to travel very far. Skilled welders can come to your own location. But a shop visit is also a choice. You get a warranty on the custom work. This gives you peace of mind while driving. The local community trusts these expert metal builders. Now you can plan your next big adventure. You have the room for every single piece. The trailer is ready for the toughest terrain. You can rely on the strength of steel.

Conclusion

Custom extensions are the future of hauling here. You can transform your trailer with simple steps. Sometimes you just need a few more feet. Now the roads of Utah feel much smaller. You have the power to carry anything today. The right help makes the job very simple. You will enjoy the extra space for years. So, consider an upgrade for your hauling needs. Your trailer can do so much more now. The possibilities for your next trip are limitless.